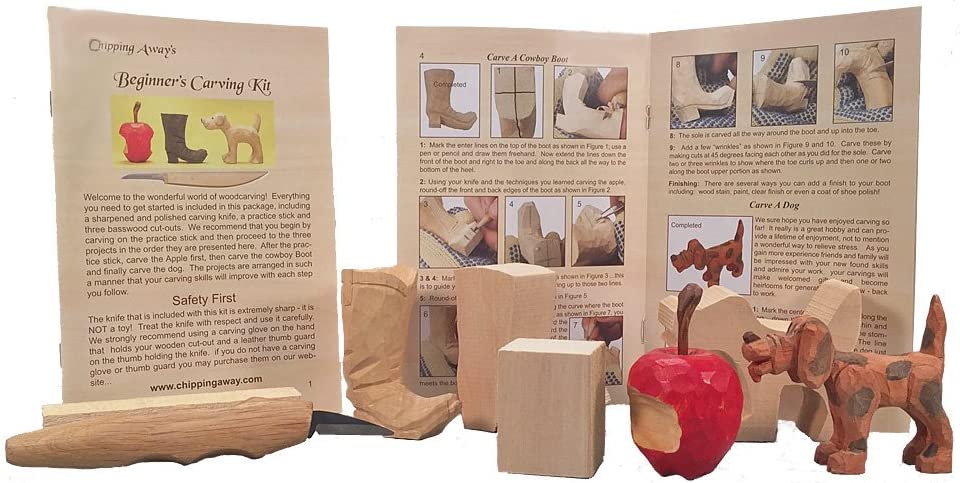
Woodcarving can seem daunting for beginners. Here are some tips and tricks to help you get started with your first animal carving job.
Dog
There are many free wood carving patterns that you can download for your dog if it's an aspiring woodcarver. These patterns will assist you in carving your dog's face in a variety sizes and styles. These are some of the tools needed to carve your canine friend. A band saw or copingsaw, chisels and a mallet are all you will need. You also need some time to sharpen them. Then, you'll be ready to begin carving!
Eagle
Native Americans regard the baldeagle as a traditional symbol for strength, courage, wisdom, and perseverance. Its primary purpose was to be the creator's messenger. It measures approximately 20 inches in size and 5 inches wide. The eagle is still a popular choice for wood carvers. There are many different wood options available for eagle carvings. This article will focus on some of the most popular wood carving styles.
Bear
Carving a wood bear is very simple. There are a few distinct lines and shapes. Each line adds weight. For extra visual interest, the front paws of bears are angled towards the legs to add interest. For those who are just starting out in wood carving, a book can help you create a bear. James Miller's book describes the entire process.
Elephant
An elephant wood carving adds character and beauty to any home. 1stDibs has 56 antique carved wooden elephants and two modern pieces. These pieces have been produced as far back as the 19th century, and have become increasingly popular in recent years. You can choose from Art Deco, Mid-Century Modern, and Folk Art styles, or you can select a smaller piece to add a subtle touch to your home decor.
Moose
Wood carving of moose can be a rewarding experience. Dowels can be used to attach moose paddles and antlers. Then push them in or glue them. You can then paint the moose using a walnut gel stain, or you can use paint to color it.
Moose template
A moose carving templates helps carvers to create realistic-looking carvings. You can use paints to color your moose carvings. Once you have mastered the basics, it is easy to carve this animal. You can add details like fur or eyes with a brush, or a typhoon piece on a diegrinder. The Moose Template is ideal for beginners who are interested in carving an animal.
Bear template
To begin a bearwood carving, you will need to create a template. Next, you will need a Dremel tool for exploring the wood features. This tool allows you to use stop cuts in order to separate the legs from their lower bodies. To indicate the split, you can make V-cuts in your legs. The underbelly can be rounded after the ear and leg pieces are completed. You should leave enough space in the back for the bear to be shaped.
Eagle template

Three detailed templates are needed to carve an adult eagle. The first template is used for carving. The second template will serve as a working paper template. It will be cut to create transfer patterns. As a reference, you can use the third template. Then, you will use the tools available to cut out the main lines of the template. Cut the lines so that they are close to the pattern. All marks should be aligned.
Template for mice
Wood carving is a fun hobby. There are many different designs that you can choose from. Using a template will make this task much easier, and there are even printable patterns available to help you along the way. You can start with a simple geometric pattern if you're a beginner. Next, you can learn more complex patterns. Once you are comfortable with the basics, you can move on to the next step: creating the perfect mouse.
FAQ
What would be your first step in woodworking?
Start with softwoods, such as pine or poplar. Once you feel comfortable with these two, move on to hardwood.
Is it easy to start a woodworking business?
Starting your own woodworking business isn't easy. There are lots of legal requirements and regulations that you'll need to follow. However, it doesn't necessarily mean you must go through all the hassle of setting up a business. Many people join already-established businesses. You only need to pay membership and tax fees.
How can my shop be organized?
The first step toward keeping your workshop clean and organized is to set aside a designated area for storing tools. To keep your tools sharp and ready for work, keep them clean of dust and debris. Use pegboard hooks to hang tools and accessories.
What woods can be used to make furniture?
Woods are classified by their hardness. Softwoods are pine, cedar and cypress. They are great for outdoor furniture as they resist rot. The hardwoods include teak, maple, mahogany and oak. They are generally indoors as they don't weather well outside.
How long does it usually take to complete a piece furniture?
It all depends on what type of wood you use, how complex your design is, and how much finishing you use. Hardwoods are more difficult to maintain than softwoods. Hardwoods can also be more costly than softwoods. They are more durable and can withstand moisture better. It takes between one and three months to finish a piece.
What kind tools do carpenters use to build?
The most common tool used by carpenters is a hammer. A hammer helps to carpenter pound nails into the wood. They can also use it to hold the pieces together as they work on a project. Other tools include clamps. pliers. screwdrivers. measuring tape. pencils. saws. drills. wrenches.
What's the difference?
Hobbyists enjoy making things out of wood, whereas professionals focus more on the quality of their work. Hobbyists often take pride in the creations they make and often share them to family and friends. Professionals will spend hours looking at designs before they start to build a project. They'll pay great attention to details, from choosing the most suitable materials to finishing the work perfectly.
Statistics
- If your lumber isn't as dry as you would like when you purchase it (over 22% in Glen Huey's opinion…probably over 10-15% in my opinion), then it's a good idea to let it acclimate to your workshop for a couple of weeks. (woodandshop.com)
- Overall employment of woodworkers is projected to grow 8 percent from 2020 to 2030, about as fast as the average for all occupations. (bls.gov)
- Woodworkers on the lower end of that spectrum, the bottom 10% to be exact, make roughly $24,000 a year, while the top 10% makes $108,000. (zippia.com)
- The best-paid 10 percent make $76,000, while the lowest-paid 10 percent make $34,000. (zippia.com)
External Links
How To
How to make wooden joints
This tutorial will demonstrate how to join two pieces together of wood. The "pocket hole joint" is a method whereby we drill holes into the wood and glue them together. If your wood has a straight grain, smooth surface, you can use this method. You may want to consider other methods, such as dowel joining. Here are the steps
-
Drill Pocket Hole Joints. You will need to measure and mark the exact location of your pocket hole joint. Then drill 3/4 inch deep holes into the ends of each piece of wood using a jig saw or handheld drilling machine.
-
Sand Smooth. The wood's edges can be sanded to prevent splitting.
-
Glue Together. Apply glue to the sides of both wood. Let it sit for about 5 minutes before clamping the pieces together.
-
Attach the Pieces together. Once the glue has dried, clamp the pieces together so they are flush.
-
Trim Joinery. Trim the excess wood around the joint after the glue has dried completely.
Make sure to leave enough room between the pieces so that you can turn them inside and out.