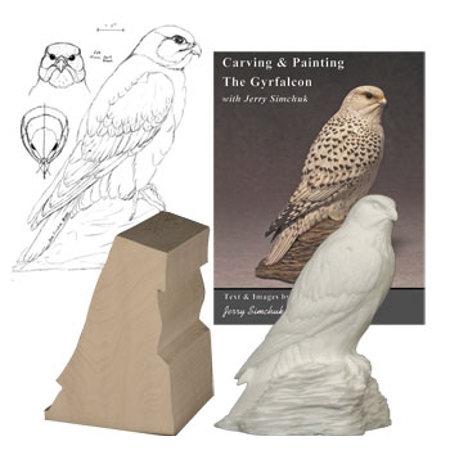
You will need to select a piece or wood for the first step. Next, make the cuts. You can follow the expert's instructions using a step by step video. The face can be made more realistic by the progression of the cut. It is important to create a lifelike facial expression by adjusting the position of the noses in the wood. To give your face a more realistic look, you can also use shellac and colored dyes.
Hardwoods
You must consider the type and size of the wood that you are using before carving a face. Hardwoods can be described as a group of trees with large leaves that can thrive in many climate zones. Hardwoods are suitable for various purposes due to their density, strength, appearance and versatility. Hardwoods can be more cost-effective than softwoods but are durable and fire-resistant.
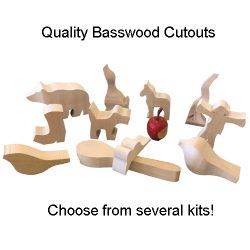
If you are new to wood carving you might consider softwood such as butternut and basswood. These woods are easy to work with, and are great for beginners. You should keep in mind that soft woods will not have the same quality or finish as hardwoods. Before you decide on a type of wood, try out different types.
Softwoods
The first step to carving a face in wood involves choosing the softwood. Softwoods are more difficult to carve, and often will have many knots. They can also be more fragile if you use long strokes. A beginner carver will frequently cut off small pieces of wood, reducing detail. This is not a big problem, but it is something to be aware.
Some hardwoods are easier than others. Aspen, butternut, and basswood are among the easiest to work with. It is recommended to use knives with a higher bevel. Softwoods also make it easier to work with than hardwoods. This allows you to carve along or against the grain. The quality of the final product will be determined by the wood used for carving.
Colored Dyes
To create a vibrant, detailed finish on a wood carving, try using colored dyes. These dyes come in many colors, and you can mix them with alcohol or water to make your own unique color. Colored dyes can be mixed with shellac for lighter woods. Be sure to ventilate your workspace and use denatured alcohol to clean brushes after applying the dyes. Another option is paste wax. A high degree of glossiness could distract from your work. Use 0000 steelwool to get rid of any excess glossiness.
There are many types of wood dyes that can be used and they are easy to apply. Wood dyes will work with all topcoats. They are also easy to apply. They solve common finishing challenges. They come in a variety primary colors so they are easy to mix up and apply. They're also available in a variety of shades and can be mixed according to individual preference. You can mix them to make unique colors.
Shellac
Shellac should be available before you apply it to your wood carvings. You can purchase a jar of shellac, but the easiest way to apply it is to use a brush. A two-pound piece will work well. It will slowly build up and reduce brush marks. Shellac is extremely thin and it is better to buy thicker cuts than thinner ones. To make sure that you get the right amount, make a pad of your own from golf ball-sized lumps of cotton and lint free cloth. After that, dip the tip end of your brush in the shellac.
Shellac can be used to highlight and add color to your grain. Shellac is available as a variety colors. This allows you to mix and match different shades of resin to create your own blends. You can also darken the shade using extra coats. Shellac doesn't get cloudy or yellow like other wood finishes. Shellac is also more durable, which means you can make even more faces. This can be done with any type or wood carving project.
Gouges
There are many different sizes and shapes available for gouges. Straight and palm gouges are two of the most popular types. Straight gouges are meant to be held by the hand while palm gouges use shorter shafts and more manageable handles. Handheld carving is made easier by the shorter handles. Also known as veiners, palm gouges are great for carving faces in wood. Before you start carving, there are some things that you need to know.
You must first know how to select the right gouge. You need a gouge that can carve a shallow groove. Make sure you buy a tool with a sharp edge and a small sweep. The most common way to classify gouges is by their size. A 3/10 gouge will make the same-size cut as a 5/10 gouge. The scoop between the edges gets deeper as the first number is increased and the sweep becomes more curvy. A small sweep can carve a shallow profile in a gouge.
FAQ
What kind of wood should you use?
Woodworking is a popular job that involves oak, pine and maple. Each wood type has its own characteristics which affect the final product's appearance and feel. Oak, for example, tends be darker and more hard than other woods. Birch, which is lighter and soft, is more heavy than mahogany. You also have the option of solid wood or veneers. Veneers are thin sheets or wood that are glued together into one layer.
How much money will I need to get started?
Since every project differs, it is impossible to give exact numbers. These factors will help you get an estimate of how much money is needed.
-
Cost of materials
-
Tools and equipment
-
Time spent on the project
-
Hourly rate
-
What profit are you expecting to earn?
-
Hire help
Start small, if possible. You can make simple boxes or picture frames if you're just getting started. As you gain more experience, you will be able tackle more complicated projects.
How much should a skilled woodworker earn per hour?
The hourly rate for a professional Woodworker will vary depending on many variables, such as experience, skill level and availability.
The hourly average rate for skilled woodworkers runs between $20-$50.
An hourly rate of $10 for a less skilled woodworker could be possible.
Which wooden items are very popular?
Wood that has been harvested sustainably is the best-selling type of wood.
The most used wood types for furniture are oak, maple and walnut.
These woods are extremely strong but also have beautiful colors and grain patterns. If they are well cared for, they can last many years.
To protect wood furniture from moisture damage, it should be painted first. This applies to all surfaces, even drawers and doors.
Paint that is water-resistant will ensure furniture lasts for a long time.
Followed by two coats, you should apply a quality oil-based primer. You may need to apply several coats of top coat depending on how much wear it is expected.
Spray cans and aerosol spray paints are not recommended. These products contain solvents which evaporate quickly and leave behind harmful fumes.
What tools work best for me?
When shopping for tools, it helps to think about your needs and preferences. Do you prefer metal or plastic handles What size of nails and screws do your hands use most? Do you prefer to use hand tools or power tools?
Statistics
- Average lumber prices rose about 600 percent between April 2020 and May 2021. (familyhandyman.com)
- Woodworkers on the lower end of that spectrum, the bottom 10% to be exact, make roughly $24,000 a year, while the top 10% makes $108,000. (zippia.com)
- Most woodworkers agree that lumber moisture needs to be under 10% for building furniture. (woodandshop.com)
- In 2014, there were just over 237,000 jobs for all woodworkers, with other wood product manufacturing employing 23 percent; wood kitchen cabinets and countertop manufacturing employing 21 percent. (theartcareerproject.com)
External Links
How To
How to properly operate a handsaw
Hand saws are used for cutting wood into pieces. Hand saws come in many forms, including circular saws. A handsaw can be made of metal or other plastic. It cuts through material such as wood and plastics.
The best thing about a handsaw is the ability to make precise cuts at all angles and without needing adjustment. It is also very easy to sharpen them, unlike power tools. However, they do have some disadvantages. They can be very heavy and bulky so it is important to take care when you transport them. Additionally, if they are unfamiliar, it is possible to injure oneself.
There are many different ways to hold a hand saw. While cutting, it is important to keep your hands clear of the blades. If you don't, you might get hurt. While holding the saw, make sure you place your fingers around its handle. Keep your thumb close to the blade. This ensures that the blade is not accidentally touched.
When using a hand saw, you should never put anything under the piece of wood you're cutting. This could cause the blade to slip from the wood's surface. Before cutting, always inspect the area. Check for nails, screws and other objects underneath the wood.
While working with a saw, you should always use safety goggles. These glasses prevent dust from entering your eyes and make it easier for you to see what's happening. Safety glasses protect your head from flying debris.
To work safely with a handheld saw, you need to first be able to operate it. Practice until you feel comfortable cutting. You'll soon be able to cut any item once you have mastered the basics.