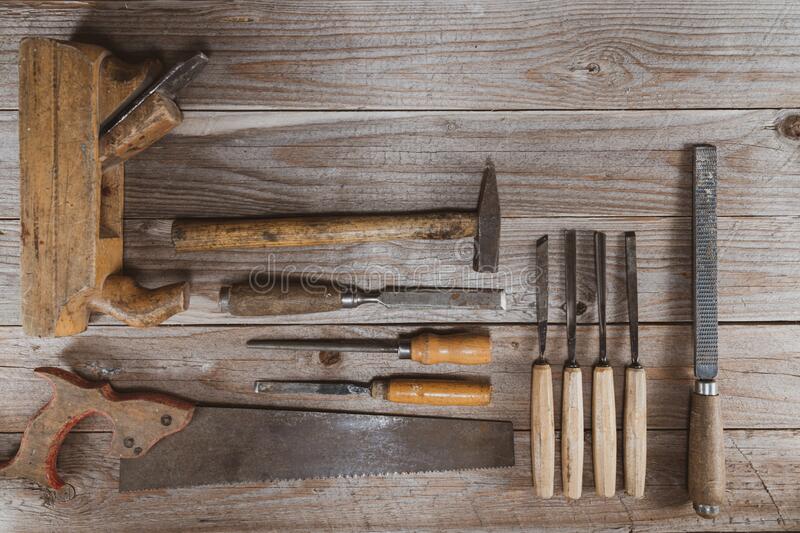
The many benefits of using a disk-sander include its fast finish and mitre gauge. Although they are smaller than their counterparts, these sanders can still deliver the same high-quality finish. There are many options available. Read on to find the right one for you. Listed below are some of the most popular benefits of a disk sander. If you want to purchase one, you'll need to choose between a sander that combines both sanding methods.
For face sanding, you can use disk sanders
Disk sanders can be used as versatile sanding instruments. The rotating disk is supported by an aluminum- or steel backing plate and spins up to sand the material's surface. The disc's center screw and washer are hidden and do not protrude into the work area of the sanded surface. Benchtop disc sanders feature adjustable worktables that can be used to make miter gauge slot slots and end cuts. Disc diameters typically range between 4 and 8 inches. You can get larger models with capacities up to twelve inches.
They offer fast finishing
Disk sanders are a great option for speed. There are many sizes available for disk sanders. They can be used to make small machines or large industrial machines. A 12" diameter disk is the standard size for most home shops. The majority of disks are made from pressure-sensitive adhesive material. A disc sander can be a great investment if you are working on a project that requires a smooth finish quickly.
They are more compact than other sanders
A disc sander is a hand tool that can be used for smoothing rough cuts on small or thin objects. They are also less portable than other disc sanders. Although they aren't as portable as other sanders but can still be used for many hand tasks, including sanding metal, plastic and wood. They are small enough to be used on both small and large items and they are also very affordable. They are also great for shaping and smoothing various types of materials.
They have a mitre-gauge
A disk sander offers many benefits, including a mitre gage. This features guides the workpiece along the disc, which prevents it from tearing out. Then, it extends the fence height, protecting your fingers from the blade's edge. The miter gauge can be locked in with a clamp. Bernard Lewan gave this tip. Here's how to do it.
The adjustable table is included.
You will first need to adjust the table’s height and tilt using a sander. Use a table with adjustable height. Make sure the workpiece doesn't hang over the table. If the workpiece is not overhanging the table, it could cause damage to the sanding disc. You should also check all other controls, such as the power plant, carriage and table height. You can purchase a miter gauge extend if you need extra support.

They have dust ports
A dust collector housing is required to attach the disk sander. The entire sander is enclosed in the dust collector housing. Only the front half of this housing is visible to the workpiece. You can expose the entire disc by removing the dust collector housing as well as the front portion. A hex wrench 34 is included for quick release of bolt 90. You will also need to tighten bolt90 to keep the bed 16 in its vertical place.
FAQ
Is it possible to learn woodworking by yourself?
Learning by doing is the best way of learning anything. Woodworking requires patience, practice and skill. To master any craft, it takes time.
The best way to learn how to do something is actually to do it. Start small and then build upon what you've learned.
How can you calculate the woodworking price?
The most important thing to remember when calculating costs for any project is to keep them as low as possible. It is important to ensure that you are getting the best materials prices. It's also worth taking into account all the other factors that may affect the cost of your projects, such as time, skill level, and experience. If you want to get an idea of what you can expect to spend on different types of woodwork projects, check out our guide to the average price of common household DIY tasks.
What would be your first step in woodworking?
Start with softwood like pine, poplar and ash. You will feel more comfortable with these softwoods, so you can move onto hardwood.
What's the time taken to finish a piece furniture?
It depends on the size and condition of the furniture. Smaller projects like boxes and picture frames can be finished within one day. Larger projects like tables and desks take many days. It takes time to properly stain and seal wood.
How much should a hobbyist invest to get started?
It is likely that you will need some capital in order to buy the required tools and supplies if your goal is to open your own woodworking business. A good place to start would be by buying a small table saw, drill press, circular saw, jigsaw, and sanding machine. These items won't break the budget and aren't expensive.
What tools should you start with to become a woodworker
Woodworking requires patience and practice. It takes time to learn how to use all the different tools and techniques required for woodworking.
There are many options for woodworking equipment today. Some prefer to use power tools, while others prefer to use hand tools.
Your choice, however, is up to you. However, you need to ensure that the tool you use is the right one for the job. It may be a good idea to start with a basic set, if possible, if you don’t know much about hand tools.
You might also want to learn how a router works, which allows you to cut wood into intricate shapes. You can find these at most hardware stores.
Is it difficult to start my woodworking business?
It's not easy to start your own woodworking business. There are many laws and regulations you need to be aware of. But, this doesn't mean you need to go through all of the trouble of setting up your business. Many people opt to join existing businesses instead. You only need to pay membership and tax fees.
Statistics
- Average lumber prices rose about 600 percent between April 2020 and May 2021. (familyhandyman.com)
- If your lumber isn't as dry as you would like when you purchase it (over 22% in Glen Huey's opinion…probably over 10-15% in my opinion), then it's a good idea to let it acclimate to your workshop for a couple of weeks. (woodandshop.com)
- The U.S. Bureau of Labor Statistics (BLS) estimates that the number of jobs for woodworkers will decline by 4% between 2019 and 2029. (indeed.com)
- Overall employment of woodworkers is projected to grow 8 percent from 2020 to 2030, about as fast as the average for all occupations. (bls.gov)
External Links
How To
How to stain wood
Staining wood refers to applying chemicals to wood's surface. This chemical reaction causes the wood to change in color. This chemical reaction causes the wood color to change from white and brownish red. Although oak is the most popular type of wood to stain, there are many other types that can be used.
There are many ways to stain wood surfaces. One method involves mixing the stain and a solvent and then spraying it on the wood. Other methods use a solution of water and dye applied directly to the wood. You can also mix stains with varnishes or paints so that they become part the finish coating.
Preparing the surface for staining wood is the first step. Clean the wood to get rid of any grease, dirt or other substances that might be detrimental to the stain's application. Sanding smoothens any scratches or rough spots. The next step is to determine the type of stain you would like to use. There are two main kinds of stains available: non-penetrating stains and penetrating. Penetrating stain penetrates deeper into wood than nonpenetrating, making them suitable for dark colors like mahogany. Non-penetrating oils work best when used with light colors, like maple.
After you've decided what type of stain to apply, get ready for your tools. A paintbrush works well for applying stains because it allows you to spread the liquid evenly across the surface. After you're done painting, make sure to have some rags handy to remove any excess stain. If you intend to mix the stain yourself you will need enough containers to hold all the components.
Once you have prepared your materials, start by cleaning the area where you plan to stain the wood. Use warm water and soap to clean away dirt and dust. Wipe the entire piece of furniture with a rag dampened with clean water. If you intend to stain darker wood, make sure you get rid of any debris.
The stain should be applied next. Begin at one end and spray or brush the stain on the wood. You should work slowly and carefully. Continue moving along the grain until you reach your opposite end. Make sure that the stain does not drip off the edge of the wood. Before proceeding to the next step, let the stain dry thoroughly.
Apply a clear polyurethane sealant to protect the painted surface. Apply three coats polyurethane sealer. Let the third coat dry overnight before you sand the final coat.