There are many wood turning videos to choose from, but which ones are worth your time? Here are four of my favorite wood turning videos: Rex Burningham and Kip Christensen. Ernie Conover and John Jordan are also great. All of these instructors share their knowledge and lead by example. I hope you find these videos inspiring to improve your skills in wood turning. These videos are worth your time and money, so make sure you check them out! Don't forget to share what you like on Facebook!
Rex Burningham
Rex Burningham wood-turning videos are a great resource for learning the basics of woodturning. These two wood turners, who have combined over fifty years of experience, have created numerous tuned projects. From spinning tops to intricate lidded containers, these DVDs cover everything from how to shape a spoon to turning an ornament display stand. These videos are sure to make your library a happy place! You can read on to learn about the amazing videos these instructors offer.
Kip Christensen
Kip Christensen has videos that will help you learn wood turning if your are a beginner. They will show you how to create functional and beautiful furniture and gifts. Besides being entertaining, these videos are also great resources to learn more about woodturning. Many of these videos include tutorials from the world's best turners.
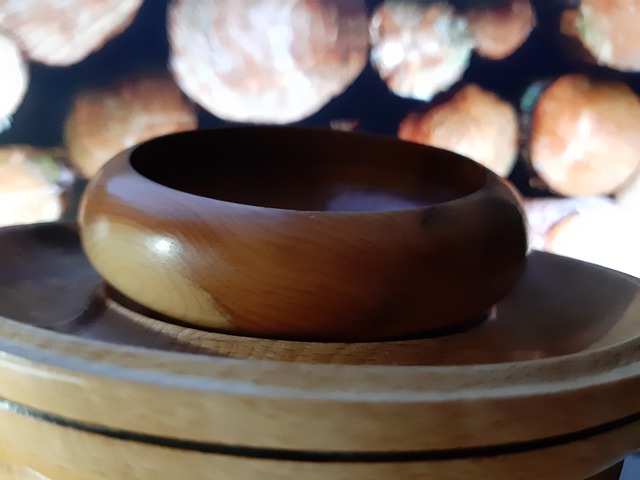
This book has 16 unique woodturning ideas. These projects range from bowls, boxes, and sculptures. Each project is illustrated with clear instructions, step-by–step photos, and a few tools. The author walks through the steps of creating each project and shares his creative thinking to make it beautiful. Inspiring you to learn woodturning? The author shares his experience and knowledge.
Ernie Conover
Ernie Conover offers a video introduction to woodturning. With more than 55 minutes of instructional videos, he provides you with everything you need to get started. You will learn about the techniques and subtle rhythms involved in the different wood turning processes. Turning for Furniture gives you an overview of the process, and opens up new possibilities for your projects. This lesson takes you inside Ernie Conover’s workshop for 55 minutes.
Ernie Conover's videos also cover turning. You can learn how to make a lathe and how to sharpen tools by watching these videos. With his videos, you can make an oyster box, an end-grain vase, and a platter. Woodturning with Ernie Conover and Woodturning A Foundation Course are complementary. They provide detailed information on starting woodturning.
John Jordan
John Jordan woodturning videos are available for purchase. This woodturning expert has taught in eight countries, as well as throughout the US. His works are part of the collections of many major museums and corporations. You can find all the details about his technique through this series of videos. This video and any other John Jordan wood-turning video can be purchased to start your journey. In addition to his books, he also has videos covering a wide range of subjects.
This DVD begins by introducing the essential safety measures that should be observed when working in wood. The DVD then discusses the different tools that are available. It then shows you how to turn a perfect basic cylindrical, and how to cut beads or fillets. John also shows how to use various turning tools. Once you're familiar with the various tools, you can start learning the process of turning. You can make a beautiful piece of woodworking.
FAQ
Do I have to refinish my furniture?
Yes! There are many different ways to refinish older furniture without the need for professional help. Here are a few suggestions:
Sandpaper can be used to remove stains and scratches. Use a clean cloth to wipe the surface.
Apply clear polyurethane varnish. Allow to dry completely before moving furniture.
Use acrylic paint to paint furniture.
Stain can be used instead of paint. The stain will give the furniture a rich look.
Use shellac wax. You can protect your wood with wax and give it shine.
How can I learn basic woodworking skills
The best way to learn how furniture construction is to make your own bench. This project can easily be done using whatever wood you have at your house. You don't need to know which type of wood you should use. Instead, get some pine boards at Lowes or Home Depot. After you've built your bench, you'll want to sand off all the rough edges and finish it with a stain or varnish.
How long does it usually take to complete a piece furniture?
It all depends on what type of wood you use, how complex your design is, and how much finishing you use. Hardwoods require more care than softwoods. Hardwoods are also more expensive than softwoods. But they last longer, and resist moisture better. The typical time taken to finish a piece furniture takes anywhere from one to three month.
What kind and type of wood should i use?
The most commonly used woods for woodworking are oak, maple, cherry. Each type of wood has unique characteristics that affect the look and feel of the final product. Oak, for example, tends be darker and more hard than other woods. Birch is lightweight and soft while mahogany is heavier and denser. You also have the option of solid wood or veneers. Veneers can be described as thin sheets of wood that have been glued together in one layer.
What is the difference in a hobbyist and professional woodworker?
Hobbyists enjoy making things out of wood, whereas professionals focus more on the quality of their work. Hobbyists are proud of their creations and will often share them with family members and friends. Professionals will spend hours looking at designs before they start to build a project. They'll be meticulous about every aspect of their work, from choosing the best materials to finishing it perfectly.
What material would your recommendation be to learn woodworking?
Start with softwoods such as pine and poplar. When you feel confident with these two, move on towards hardwood.
Statistics
- Most woodworkers agree that lumber moisture needs to be under 10% for building furniture. (woodandshop.com)
- The best-paid 10 percent make $76,000, while the lowest-paid 10 percent make $34,000. (zippia.com)
- Average lumber prices rose about 600 percent between April 2020 and May 2021. (familyhandyman.com)
- If your lumber isn't as dry as you would like when you purchase it (over 22% in Glen Huey's opinion…probably over 10-15% in my opinion), then it's a good idea to let it acclimate to your workshop for a couple of weeks. (woodandshop.com)
External Links
How To
How to join wood without using nails
Woodworking is an enjoyable hobby. You can make useful items from wood with your hands, which is both relaxing and fun. Sometimes you may want to join two pieces together of wood without using nails. This article will show you how to do it to make your woodwork projects look great.
Before you can join the wood pieces together, you need to remove any rough edges. Avoid leaving sharp edges that could lead to problems later. Once you have done that, you can begin gluing your boards together.
If you're working with hardwood, you should only apply glue to one side. You should glue both sides if you are working with softwoods such as pine and cedar. Once you have applied the glue, press down on the boards until they are fully attached. Before you proceed to the next step, be sure to let the glue dry completely.
After you have glued your boards, drill holes where you want to insert screws. You can choose the type of screw to determine the size of your holes. For example, if your screw is a 1/2-inch wooden screw, drill a hole that is at minimum 3/4 inches deep.
Once you've drilled your holes, you'll want to drive the screws through the joint and into the backside of the board. Don't hit the board's surface. You could damage the finish. When driving the screws, try to avoid hitting the ends of the screws too much. This will prevent the wood from splitting.
You'll need to protect your completed project from the elements. To do this, you can seal the entire furniture piece or just cover the top. You will want to choose a product that will be durable for many years. There are many options: oil-based varnishes; polyurethane; shellac; lacquer.
These products can generally be found in any home improvement shop. Be sure to choose the right one for your project. Remember that some finishes can be toxic, so you should not use them indoors. Wear protective gear whenever you are handling them.