There are many methods to carve a Gnome. There are a few important details to consider before you start carving. The carving process is enjoyable and rewarding. It involves multiple layers and can be a great way of learning how to carve the gnome. There are also several different ways to add creativity to your gnome carving. Below are three suggestions for carving a wooden gnome.
Freehand carving a gnome
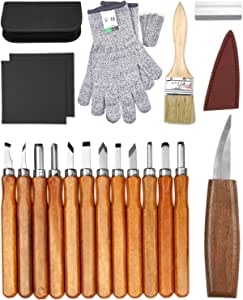
These are some helpful tips for carving a freehand gnome to use as a Christmas ornament. While it is possible to carve a gnome using only a knife, a micro V-tool is necessary if you want to add fine details to the hat rim or beard. Fortunately, a gnome is a fairly simple carving project, and you can even carve a gnome in your spare time!
The gnome is a great way to test your skill in freehand carving. These gnomes were popular garden ornaments and are still very much in demand. Carving a gnome from wood is a great way to gauge your skill and see where you need to improve. You can also use it as a measuring stick to determine design, depth, detail, or design. Once you have mastered the gnome drawing you can begin to sculpt his features.
Whistle carving is a must-try woodcarving project
The whistle is an excellent project for woodcarvers. The whistle is a simple yet useful tool that you can carve. This will make it easy to share the experience with your friends. If you want your whistle functional, there are some important steps that you should follow. We will be covering the entire process of carving a whistle, starting from preparation until the final product.
To begin the project, you will need a straight-edged blade and non-toxic oil. Although it may seem intimidating to carve a gnome, it is a simple project that will help you improve your woodcarving skills as well as give you an outlet. It's also one of the best beginner projects, as it will provide you with an opportunity to practice many woodcarving techniques.
Creativity to Gnome Carvings
Adding creativity to gnome carvings can be as simple as adding a colorful hat. You might find a wood-carved gnome to be whimsical or a charming decoration. Or, you might love a friendly troll. Gnomes add personality and charm to your garden. They can be made from wood, stone and other materials.
A gnome made of wood
The first step in carving a wooden gnome is to determine the block size. Drawing the anatomy of your gnome will be easy. It will include the face, body as well as the feet, belt and hat. To create smooth corners for the face, you will need to make V-cuts in particular areas. Use a knife or chisel to make V-cuts at the correct places. Then, using a micro V-tool, cut out a piece of wood about 1.5mm thick. This will create a nice curve for your hat rim or beard.
When carving a gnome, you need to keep in mind that it is a beginner-friendly project. You have the potential to produce excellent work. By carving a gnome once a week, you can expect to see progress in every step. Although it may not be possible with all projects this will make you noticeable improvements in design, shape, facial features, and overall project progress.
Add a new gnome to your world of gnomes
Gnomes, like other RPGs, have a recurring character called David. This character is not insane. Telepathy, Can't Argue With Elves, and Speak Fluent Animal are some of his traits. He can also be seen putting up road signs in an attempt to scare people. David and Lisa may even have a rivalry going.
Gnomes are powerful casters and very skilled at using arcana. They're also the only viable race in the game. Other gnomes have the same skeleton animation, such as the undead, and the leper gnomes. Gnomes have always had a strong presence in Kirin Tor. Meryl Felstorm, their founder, had a gnome associate.
FAQ
How often should I purchase new supplies?
You may have to replace certain tools. You'll need to sharpen your hand tools regularly if you use them. Power tools will require replacement parts every so often. Avoid buying too many products at once. Spread your purchases out over several months.
How long does it take for furniture to be finished?
It depends on the type of wood you choose, the complexity of the design, and the amount of finishing you apply. Hardwoods require more care than softwoods. Hardwoods can also be more costly than softwoods. They last longer and are more resistant to moisture. The typical time taken to finish a piece furniture takes anywhere from one to three month.
What's the time taken to finish a piece furniture?
It depends on the size of the piece of furniture. For smaller projects such as picture frames and boxes, it can take less than a day to complete. Larger projects such as tables and desks can take several days to complete. It takes time to stain and seal the wood properly.
Statistics
- If your lumber isn't as dry as you would like when you purchase it (over 22% in Glen Huey's opinion…probably over 10-15% in my opinion), then it's a good idea to let it acclimate to your workshop for a couple of weeks. (woodandshop.com)
- The U.S. Bureau of Labor Statistics (BLS) estimates that the number of jobs for woodworkers will decline by 4% between 2019 and 2029. (indeed.com)
- Overall employment of woodworkers is projected to grow 8 percent from 2020 to 2030, about as fast as the average for all occupations. (bls.gov)
- Woodworkers on the lower end of that spectrum, the bottom 10% to be exact, make roughly $24,000 a year, while the top 10% makes $108,000. (zippia.com)
External Links
How To
How to make wood joint
This tutorial will show you how to join two pieces of wood together. We'll use the "pocket hole joint," which means we drill holes in the wood and then glue them together. If your wood has a straight grain, smooth surface, you can use this method. If your wood isn't straight or flat, you might want to try another method, such as dowel joinery. Here are the steps
-
Drill Pocket Hole Joints. First, measure the area where you wish to place the pocket joint. Then drill 3/4 inch deep holes into the ends of each piece of wood using a jig saw or handheld drilling machine.
-
Sand Smooth. Sanding the wood's edges will ensure that the joint doesn't split.
-
Glue the two sides of the wood together. Apply glue to the sides of both wood. Let it sit for about 5 minutes before clamping the pieces together.
-
Secure the pieces together. Once the glue has dried, clamp the pieces together so they are flush.
-
Trim Joinery. Trim any excess wood surrounding the joint once the glue has dried completely.
Allow enough space between pieces so you can turn them inside out.