
If you're looking for information about turning handles, there are three websites I recommend: Eddie's site (with Copper couplings), and Sovereign manage system. Eddie has a lot of valuable information for the woodturning world, but I am not a fan of his video tutorials. They are outdated and very poor quality. But, there is plenty of information on the Internet about turning handles as well as copper couplings.
Sovereign handle system
The Sovereign handle system for woodturners is a new and unique handle system. Its handles, which can be interchanged, are made by Robert Sorby of Sheffield, England. Sovereign tool handles accept 5/8" diameter tools. To accommodate different lengths of tools, Sovereign Collet Adapters are sold separately. Sovereign handles systems are manufactured in Sheffield. They offer quality and value.
Woodturning chisels
You need high-quality woodturning tools, regardless of whether you are a beginner or an experienced woodturner. Most of the modern chisels are made from HSS, which is a good choice for the budget-conscious woodturner. These tools are affordable and won't cost as much as high-quality, expensive woodworking chisels. A good woodturning chisel set will consist of four or five tools.
Woodturning gouges
A set of woodturning handles and gouges will be helpful if your first time woodturning. Although turning wood can be fun, it is important to keep in mind that safety precautions are crucial. You could get hurt or lose your tool. First, you need to set a budget. Make sure you are comfortable with your budget. Quality roughing gouges will last for years, so do not skimp on their quality.
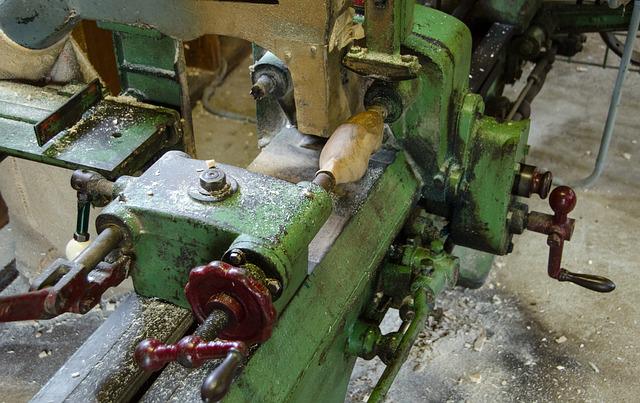
Copper couplings
Many woodturners use brass or copper plumbing couplings for their turning handles. They first remove the flats from brass nuts using a scraper, then turn with their HSS tools to create round ferrules. As they can be easily damaged, protect your HSS tools while installing these couplings. A repair coupler may be used to replace a copper coupling that bursts.
Drawknife
Drawknife turning hands are made out of wood. This tool was traditionally used for woodworking. These tools were often made of paneling and rough-cut floors. It was also used for making tool handles. It was commonly used to shape axe handles and stool legs. It could also be used in cutting wheel spokes. The final step was to finish the work with a spokeshaver, or scraper.
Spokeshave
A spokeshave is a cutting tool used for shaping wooden objects. It looks similar to a plane with two sides. The spokes can be turned by pulling or pushing against the piece. They can also smoothen most curves. To use a spokeshave you will need to start with a small piece of wood. Then, work your way up the piece until you achieve the desired shape.
Plane
There are many methods that you can use to turn the handles in your plane. Take a measurement of the length of the foot, and then cut it down to one-fourth inch. Drill a 1/4-inch hole through the foot at the handle's front using a sharp bit. To reduce exit tearout, you will need a small reamer. The second step is to drill a shallow hole in the space between the rear and front screws.
FAQ
What is the average time it takes to finish furniture?
It depends on the wood type you choose, the complexity and the amount you apply to the finished product. Hardwoods, on the other hand, are more durable than softwoods. Hardwoods can also be more costly than softwoods. They are more durable and can withstand moisture better. Finishing furniture can take anywhere from one week up to three months.
How can my shop be organized?
Setting aside an area to store tools is the first step in keeping your workshop organized. To keep your tools sharp and ready for work, keep them clean of dust and debris. Pegboard hooks can be used to hang tools and accessories.
How do you know which tools are the best for you?
It is important to consider your needs and preferences when shopping for tools. Do you prefer metal or plastic handles What size nails and screws do you usually use? Are you comfortable with power tools, or would you rather use hand tools?
Statistics
- Woodworkers on the lower end of that spectrum, the bottom 10% to be exact, make roughly $24,000 a year, while the top 10% makes $108,000. (zippia.com)
- Most woodworkers agree that lumber moisture needs to be under 10% for building furniture. (woodandshop.com)
- Average lumber prices rose about 600 percent between April 2020 and May 2021. (familyhandyman.com)
- The best-paid 10 percent make $76,000, while the lowest-paid 10 percent make $34,000. (zippia.com)
External Links
How To
Tips on how to drive a nail in wood
The first step in driving a nail into wood is to choose the correct size and type of hammer. Claw hammers include mallets, claw hammers (sledgehammers), mallets, ball-peen hammers, hatchets, and mallets. Each type has its strengths and weaknesses. A claw hammer is best for hitting nails or hard objects. However, it can be difficult to pinpoint exactly where the blow will land. The sledgehammer works well for large areas, but is too heavy for smaller tasks.
Place your hand flat on the side of your chosen hammer so that the handle rests in your palm. Grab the handle tightly, but do not squeeze too hard. Hold the hammer straight up, keeping your wrist relaxed. You should then swing the hammer straight up, keeping your wrist relaxed. The impact of the hammer hitting the nail should be felt. Try practicing with a block to help you master the art of swinging a stick.
When you're ready to start driving the nail, hold the hammer in front of you close to your body. You will need to position the nail so it is parallel to the wood. Keep your attention on the tip. Swing the hammer forward, then follow through with the motion of the hammerhead. Repeat this action several times, gradually increasing the speed of the swing. When you are confident with the technique, add power to your swings. Then, raise the hammer from your shoulder to bring it down. You'll have more energy to work with.
Once you've nailed the first hole, remove the hammer from the nail. To remove the remainder of the nails, you can use a screwdriver/pry bar. Keep the nails heads in line with the surface of the board to prevent splitting the wood.